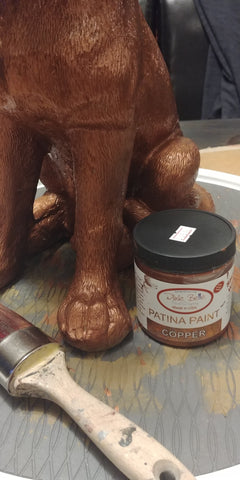

He had eye hooks on each side of the bone that were rusty so I started by pulling them out. I think he is concrete or some type of heavy resin. I'm not totally sure but was likely intended for an outdoor garden decoration.

First he need a good clean. There was lots of texture to him so I just rubbed him down with soap and water and let dry. My thought was to make him look like a copper statue that had been weathered outdoors so I chose his base color "pine cone" from Dixie Belle.

Using a synthetic brush I gave him a rough coat of paint. I like to use a lazy Susan tray when painting little items as it spins, so I can work quickly without having to pick up the piece very much. I still somehow get paint all over my self but it does help quite a bit.

The first coat came out great. I like to do a base coat while using patina paints because that way if I miss anything you will never know. If you leave it white it might show through.

Next he was left to dry 30 min. Once he was dry I pulled out my Copper Patina Paint and did a full coat of copper on top of the base coat. This is just preference as I wanted him to look like a copper statue. If you were doing something similar you could also just paint a bit of copper here and there for a more patched look if you wanted. This looks great with blended colors as well. I was just trying to keep this one simple.

After a coat of paint he looked great already! I almost changed my mind and just left him like this but I wanted to use him outside and have him look like he had been weathered so I carried on.

This copper paint is really nice and has great coverage so I will be sure find something else to use the left over paint on.

So once I had on the one base coat of chalk paint in "pine cone" and 1 coat of copper (which had dried for 30 min) on him I was ready to use the patina spray to start the aging reaction. NOTE your paint must be wet for reaction.

You can use the spray bottle it comes in but I find it a bit to hard to control and a bit to strong of a stream when it comes out so I transfer the spray into a continuous fine mist bottle and use the mister instead. It is much easier to use and the fine mist spreads nicely so the coverage is great.

Once you are ready for the reaction you need to paint on one more coat of copper where you want the reaction to take place. The paint must be wet to work. I do one coat and let it dry and do the next coat just as I am ready to spray. I wanted him to look like he changed from rain so I ended up painting him all over in another coat of copper. You need the copper paint to be wet to get a reaction so you need to work fast.

So just a reminder get your spray patina ready, paint your piece all over again or in the spots you want to react and spray the spots with your patina spray. I stood above him and sprayed his head, paws and legs and back where I thought rain would hit him if he was out in a garden. This is completely up to you to spray all over, just in spots, or a lot or very little. Whatever you end up doing you can paint over and respray if you want more or less of the reaction.

You can see a bit of a reaction right away... notice the top of his head and ears.

Then you will see more reaction like in this photo on his paws and face. This takes time to develop. So he is set aside overnight or at least 24 hours to make sure the reaction is done.

When I checked on him the next day the reaction was done and this was the final effect. I loved it! But if for any reason I wanted to change him a bit I could have gone back and painted a bit more copper here and there. Or painted copper again and sprayed again. You can experiment and do it again if you want too until you get what you like.

I top coated him with gator hide which at first took away the aged look but when he dried it all came back. If I was going to use him inside only, I would not have even bothered with a top coat as it changes the look a bit but I wanted to put him outside again on a porch so he needed a top coat.

This was a super fun project and I can't wait to try it again!


